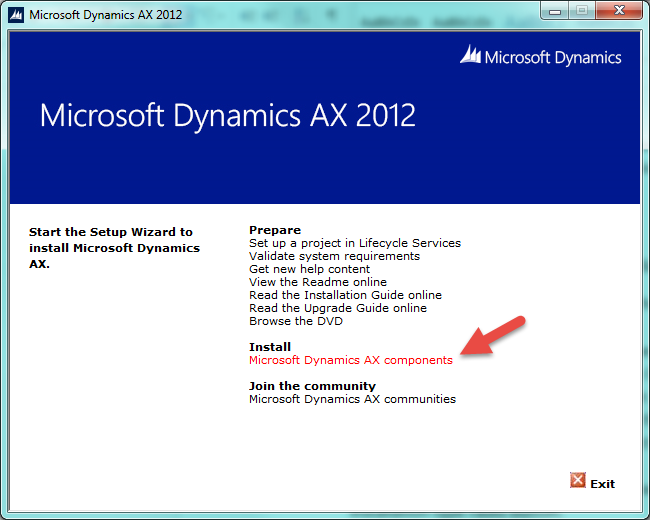
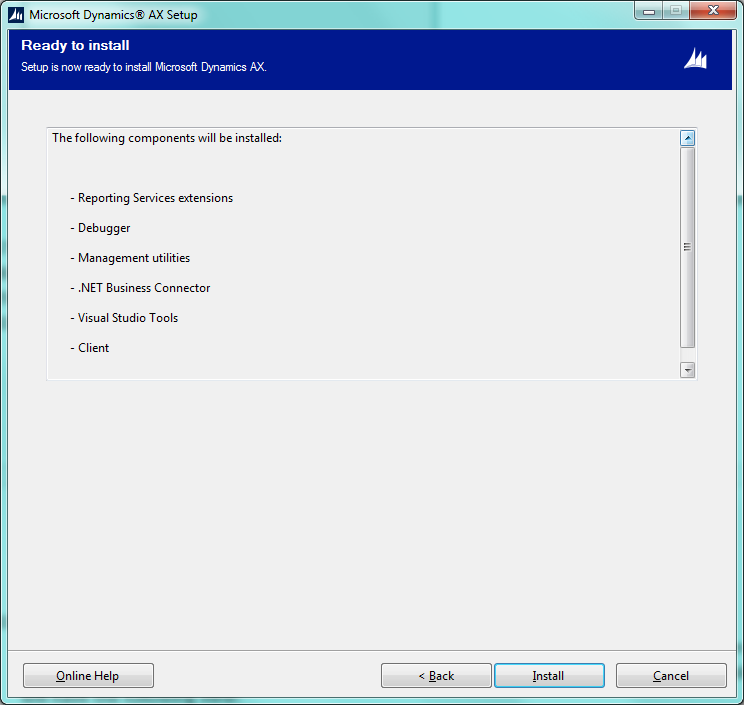
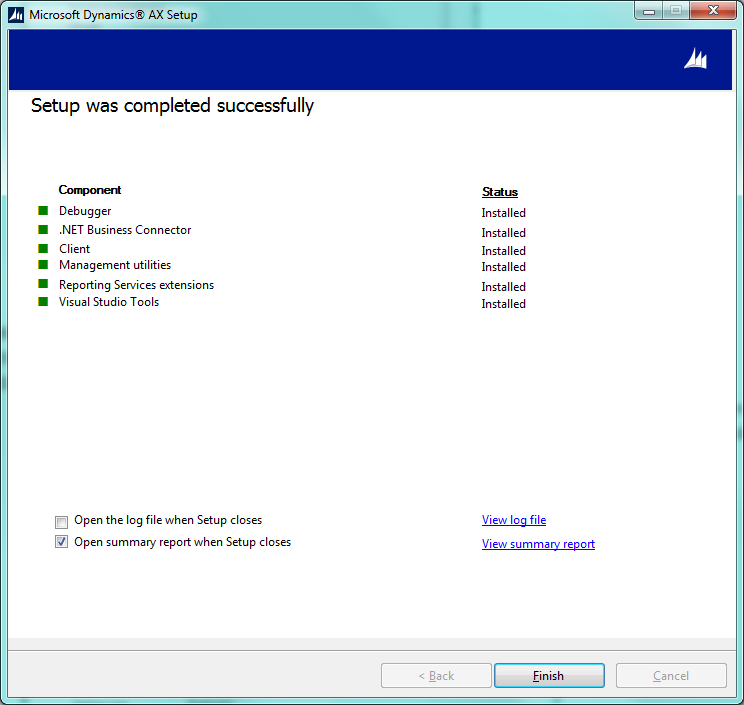
Installing Dynamics AX is the first step of installation process. Follow the
link to refresh the info about this process. After Dynamics AX is installed, it should be initialized. After the initialization, Dynamics AX should be populated with data (manually or by importing demo data). In this training lesson, we will go through Dynamics AX 2012 Initialization checklist. It is a common procedure for all versions of Dynamics AX. Let’s begin.
A license file is required to complete this lesson. If you have access to the Microsoft Partner or Customer sources, you can download the license file from
here (the Demo Virtual Machine Licenses section). Microsoft has uploaded a new license file that expires on
December 31, 2015.
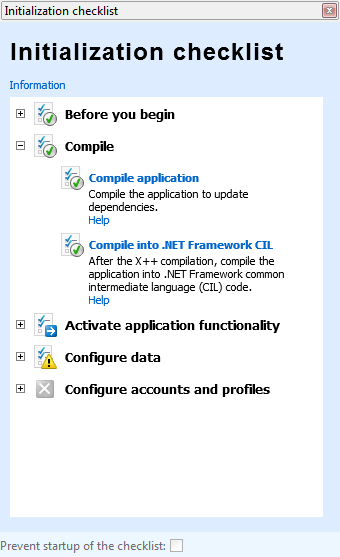
Initialization checklist
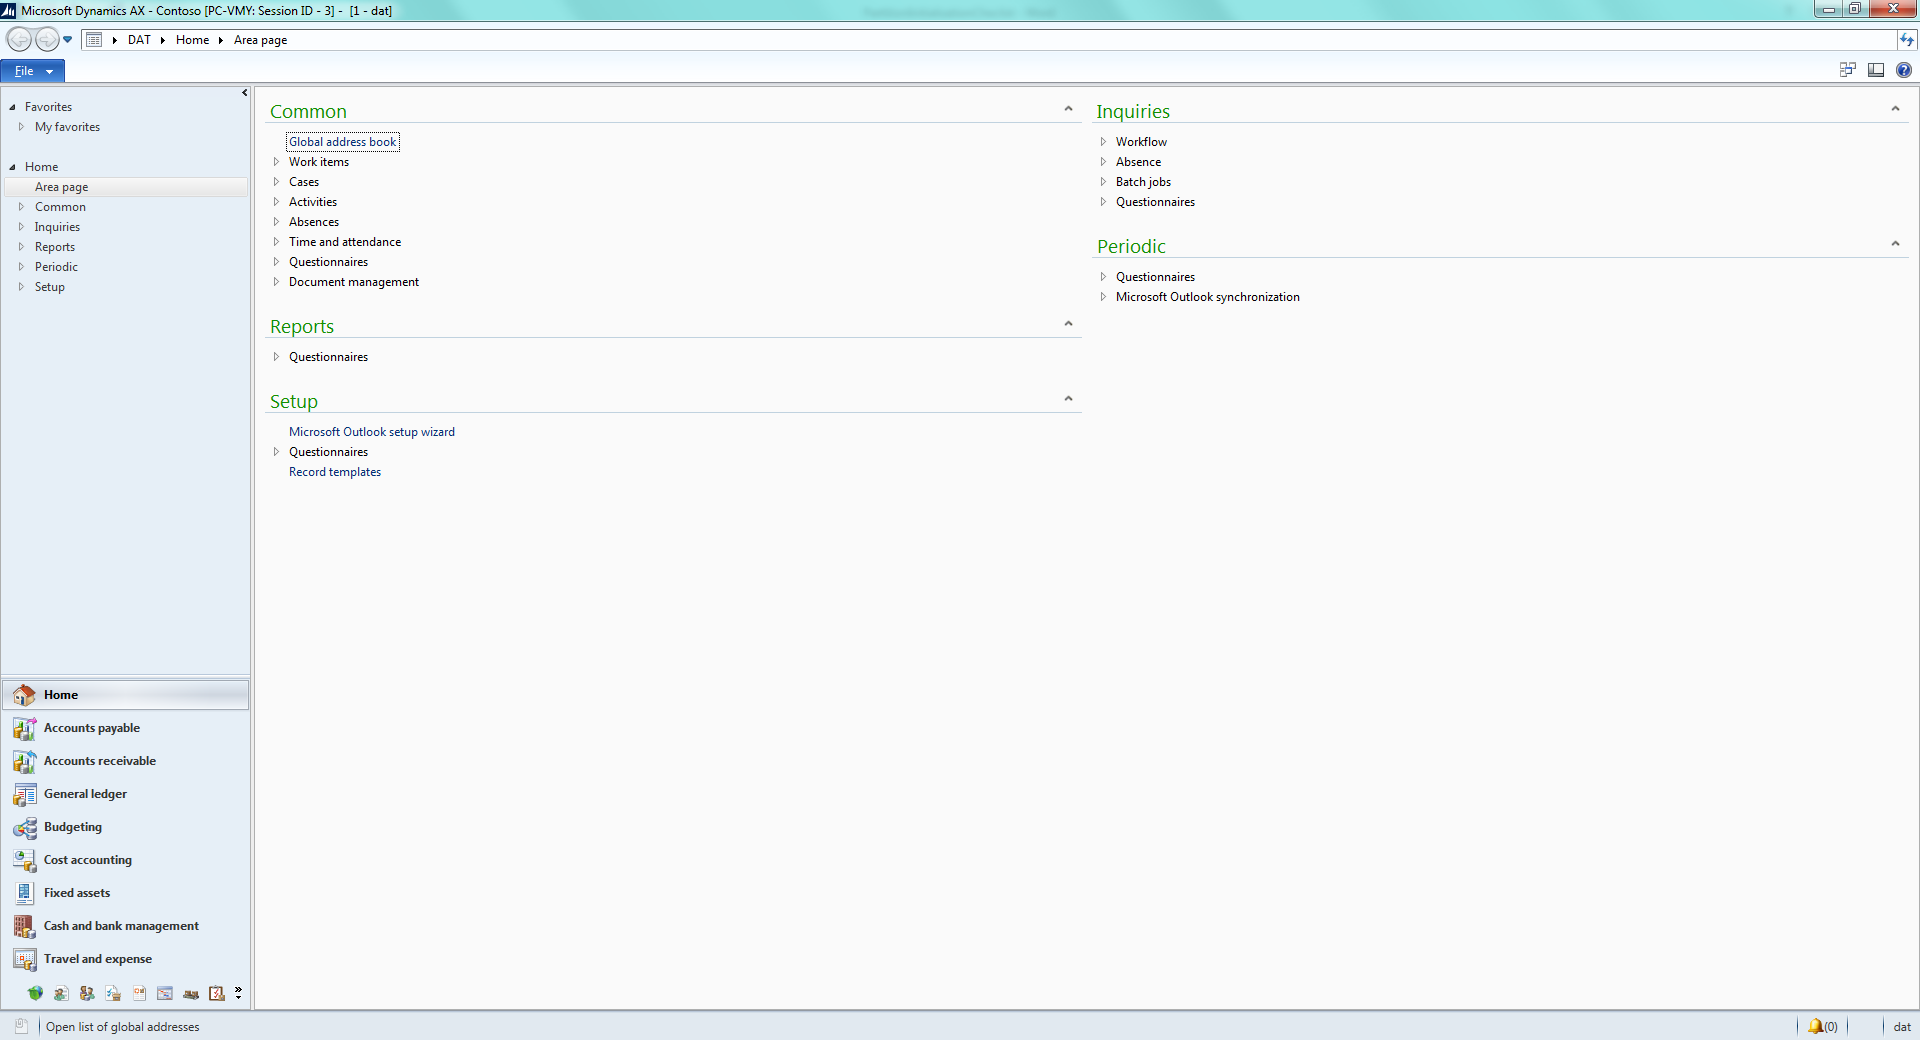
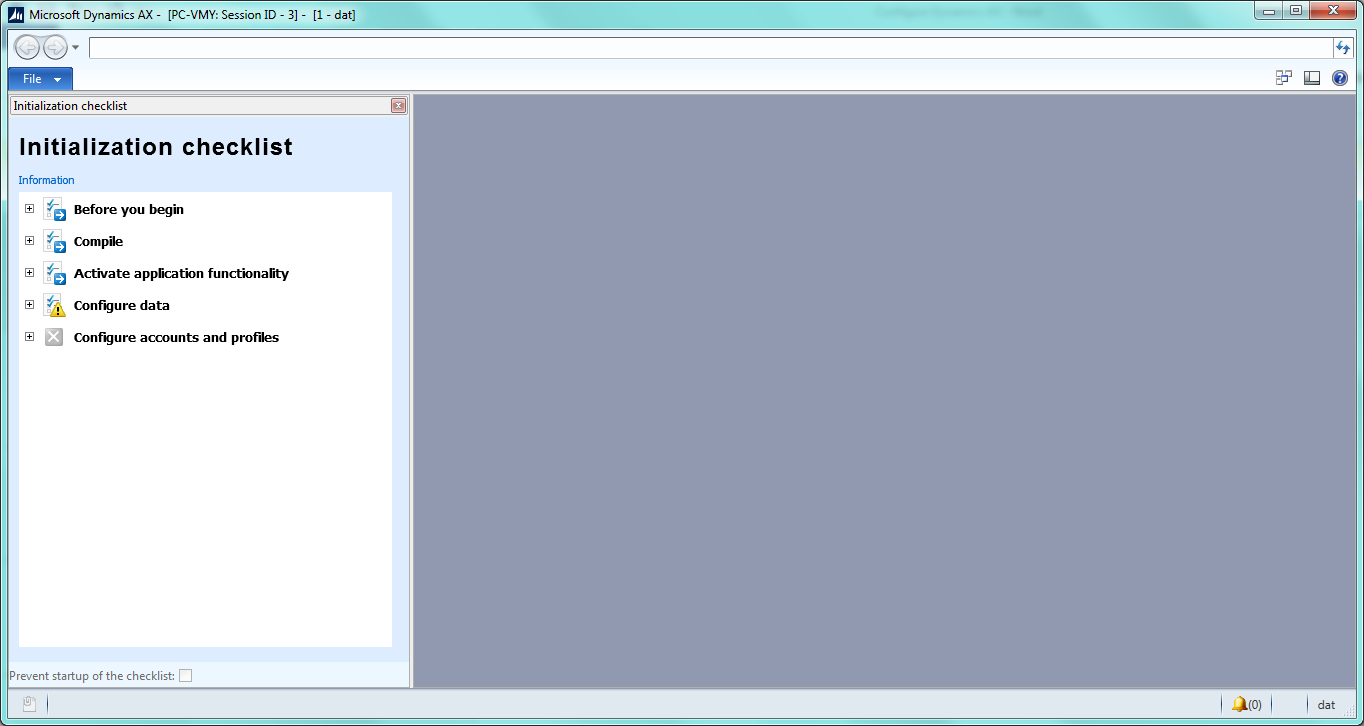
Make sure that the Microsoft Dynamics AX object service is running in Windows services. Launch the Dynamics AX client. The Dynamics AX client with the Initialization checklist opens.
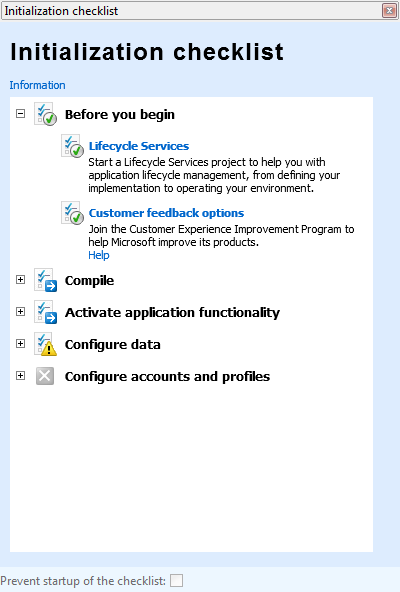
Before you begin
When you expand the Before you begin node, you see the Lifecycle services and Customer feedback menu items. Click the Lifecycle services menu item. As a result, the node is marked as completed and you are proposed to join the Microsoft Lifecycle service. The service is more applicable for project management. It is optional and up to you to use it.
The Customer feedback menu item is also optional. You can click the Mark as complete menu item.
When both menu items are marked as complete, the Before you begin node is also marked as complete.
Compile
Open the Compile node. It contains two menu items: Compile application, Compile into .NET Framework CIL. Both steps are mandatory and by the way time consuming.
Click the Compile application menu item. You are prompted that it can take long time. Click Yes. The system starts compiling the application. On average it takes up to 6 hours.
When the compilation process is finished, the Compile application menu item is marked as complete.
Click the Compile into .Net Framework CIL menu item. You are prompted that it can take long time. Click Yes. The system starts compiling CIL. On average it takes up to 30 minutes.
When CIL is compiled, the infolog with the information about the started services is shown. Now both menu items and parent node are marked as complete.
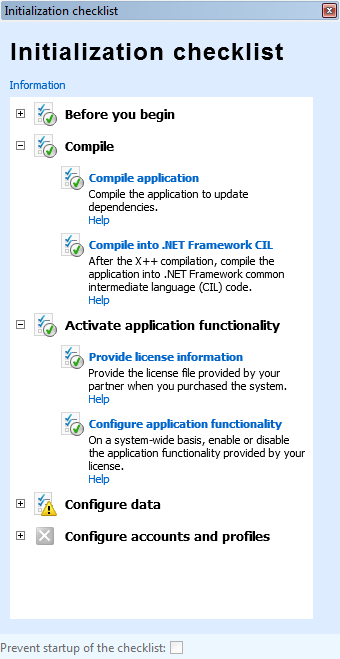
Activate application functionality
Open the Activate application functionality node. It contains two menu items: Provide license information, Configure application functionality.
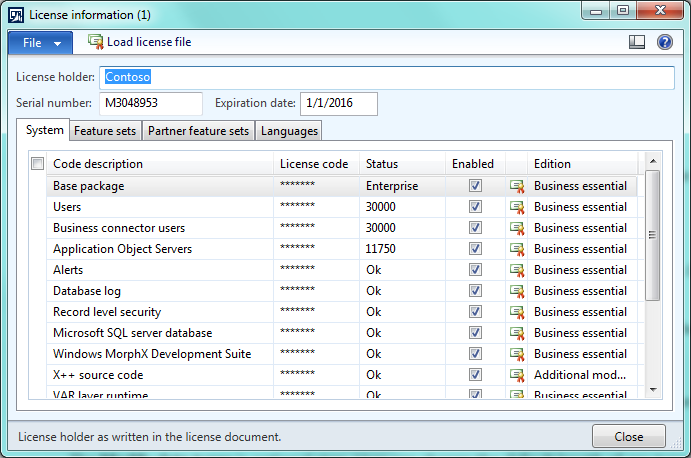
I have downloaded the Dynamics AX license file from the
Partner source.
Click the Provide license information menu item. The License information form opens. Click the Load license filebutton, select the license file, and click OK.
As a result, the Infolog with the messages appears and the License information form looks as follows:
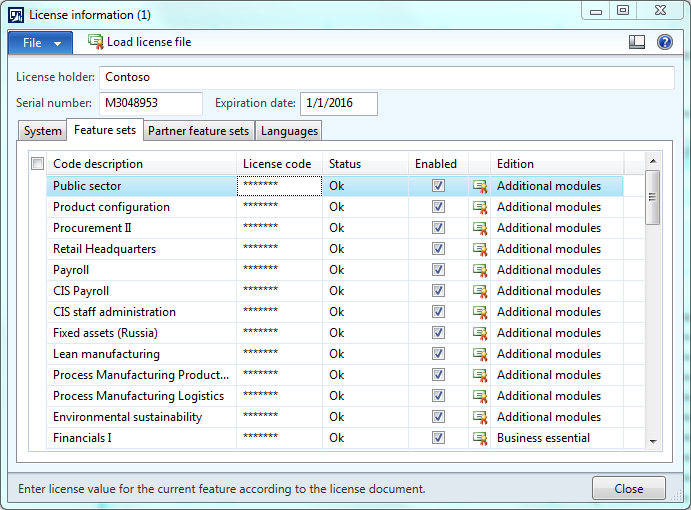
On the Feature sets tab, you can find all modules that are enabled.
TIP: If you want to disable some module, the easiest way is to clear the License code field. (You can reload the license file at any time).
Click the Configure application functionality menu item. The License configuration form opens. You can enable or disable some module features but you cannot disable the entire module.
Usually it is required to have either all module features or none. Use the tip above for instructions.
Click OK. We have both menu items and the node marked as complete.
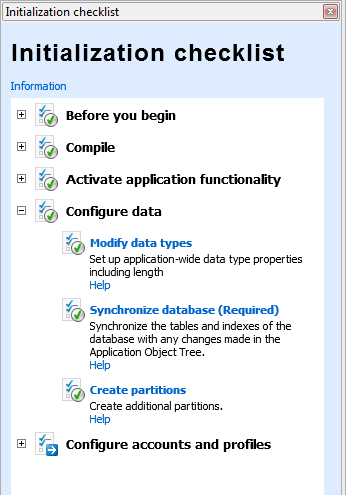
Configure data
Open the Configure data node. It contains three menu items: Modify data types, Synchronize database, Create partitions.
The
Modify data types is an optional step. The user can change the default length of any data type. For example (
from TechNet): To change the number of decimal values of the
Amount data type, enter the number of decimal values you require in the
Decimals field. If you change the number from 2 to 0, the amount that inherits from the
Amount data type appears as 200 instead of 200.00. The change is reflected throughout the system where the
Amount data type is used.
Each Dynamics AX table field should have a data type assigned.
Note that it is not about how this type is displayed rather how this type is stored in the SQL. So the TechNet explanation is a bit confusing.
For example the user specifies 20 decimals for the Amount data type. The customer transaction amount field uses the Amount data type. The customer transaction amount is saved in the SQL as 200.0000000000000000 (note there are no 20 decimals because the SQL maximum size of decimals is 16) and is shown to the User as 200.00.
Because the display format is set up in Windows:
- Control Panel\Clock, Language, and Region
- Change date, time or number format menu button
- Additional settings button
- of digits after decimal field
Click the Modify data types menu item. The Modify data types form opens.
Leave all values by default and click OK.
On the Synchronize database step, the system creates tables and views (CustTable, CustTrans, SalesTable etc) in the MicrosofDynamicsAX database from the metadata. For the DAX 2012R2 and above versions, the metadata is stored in the MicrosoftDynamicsAX_model database. For the lower DAX versions, metadata is stored in the same MicrosoftDynamicsAX database.
Click the Synchronize database menu item. The system starts synchronization. This is a time consuming process which usually takes up to 30 min.
Starting from DAX 2012 R2, the Create partitions menu item is added. For development, test, or education environments, it is enough to have one Initial partition that is created by default. Partition is a logical split of data. Data from different partitions is stored in the same database and tables use the same AOS instance. Each data contains information about its partition. Each user has access to one or many partitions.
Click the Create partitions menu item. The Partitions form opens. The form contains one default partition. Close the form.
As a result, we have all three menu items and the node marked as complete.
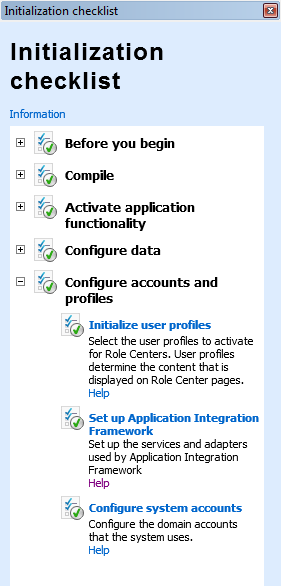
Configure accounts and profiles
Open the Configure accounts and profiles node. It contains three menu items: Initialize user profiles, Set up Application Integration Framework, Configure system accounts.
Click the
Initialize user profiles menu item. The
Initialize user profiles form opens.
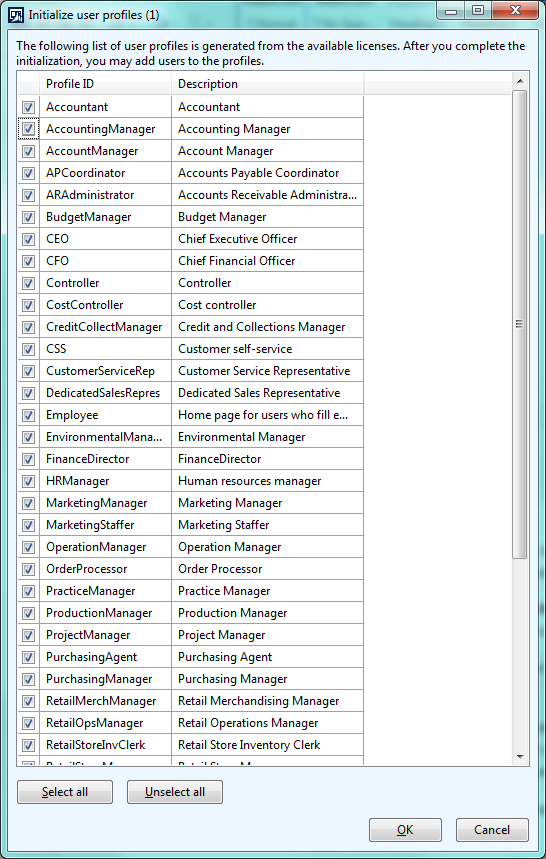
Dynamics AX suggests creating listed user profiles (user roles) in the system.
For development, test, education environments, the SYSADMIN user role is used. This role is hardcoded and always exists in Dynamics AX. The user with the SYSADMIN role has the maximum permissions in Dynamics AX.
For production environment, user profiles can be used to restrict access to some data. For example, a sales manager should only see his/her own sales orders and not the orders of another sales manager. Or a billing clerk has access to Invoices but doesn’t have access to the company revenue information.
In any case having suggested user profiles does not harm our Dynamics AX application. Click the Select all check box in the Initialize user profiles form and click OK.
Click the Set up Application Integration Framework menu item. The process takes about 20 minutes. During this time, some standard services are published to the AOS. Starting from DAX 2012, the WSDL services are hosted on the AOS.
For example, you can check that the BI service has been deployed:
http://localhost:8102/DynamicsAx/Services/BIServices. Note that in my case, the 8102 port is used (by default it is 8101). The port is configurable in the Dynamics AX Client configuration (can be run from the Control panel).
The Application Integration Framework is used to exchange data in XML format. Third-party applications can request some data from Dynamics AX or send some data to Dynamics AX.
Note that in AIF data is transferred in XML format only. User cannot change the file structure.
AIF is not about the file format it is about data transfer. So, for example, if it is required to export data to the CSV format, AIF cannot be used.
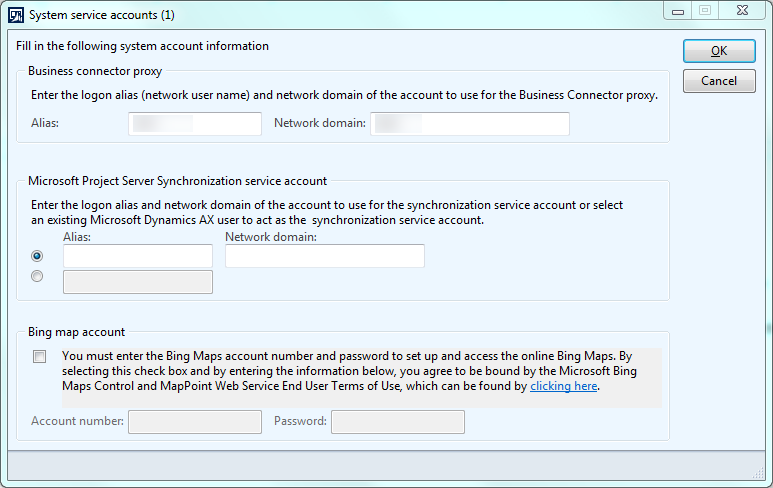
Click the Configure system accounts menu item. The System service accounts form opens. It is required to specify the Business connector account.
Dynamics AX Business connector uses this account to log in to Dynamics AX. (So this user should have access to DAX).
Business connector is used by a third-party application to access the DAX data or run the DAX business logics. It is the .Net library with a set of classes that can be used in third-party applications.
By the way, Business connector is used by SSRS when Dynamics AX reports is run.
I specify my domain account as Business connector account.
Click OK.
As a result, we have all three menu items and nodes marked as complete.
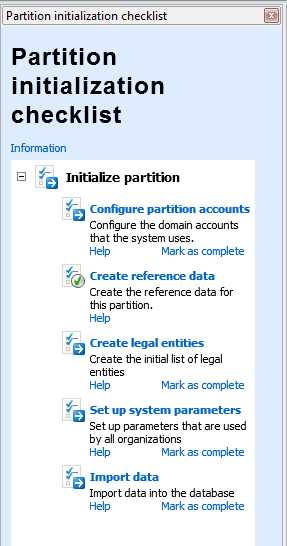
Starting from DAX 2012 R2, the Partitions are introduced and the new Partition initialization checklist is added.
Now Dynamics AX has the Companies and the Partitions. Both are a logical split of data. Data from different partitions and companies is stored in the same database and tables and use the same AOS instance.
A Company is a low level entity which contains one-company specific information (for example Sales orders). Some information is cross company for example Users, i.e. users are shared between all companies.
A Partition is a high level entity that has its own set of companies. Partition contains multiple-companies specific information plus cross company information. Cross company information from one partition is not accessible from another partition.
For development, test, or education environments, it is enough to have one Initial partition that is created by default.
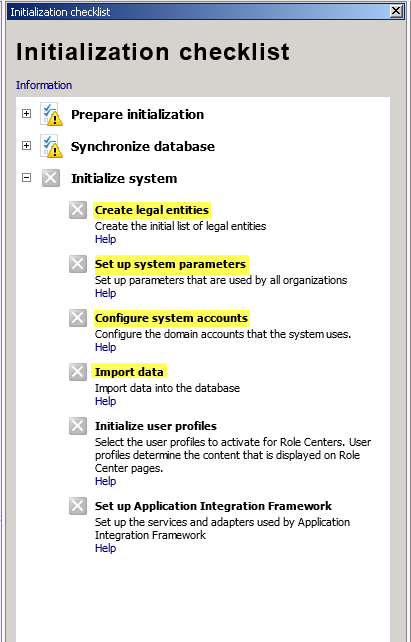
Let’s run Dynamics AX. After you complete the tasks in the Initialization checklist, the Partition initialization checklistopens automatically when you first start the Microsoft Dynamics AX client. You can also open the Partition initialization checklist by clicking System administration > Setup > Checklists > Partition initialization checklist.
The Partition initialization checklist has the following view:
Basically this checklist contains the same steps that were in the Initialization checklist of the previous version of Dynamics AX.
You can check it here.
Click the Configure partition accounts menu item. The System service accounts form opens. You are asked to enter the Workflow execution account. It is an optional step. If you do not use the Workflow, you can leave this account empty. Otherwise fill it in. Click OK.
Click the Create reference data menu item. The job is run. As a result, all parameters tables are populated with default values (for example, the CustParameters table), and some default data is populated (for example the Currency and Language tables).
Click the Create legal entities menu item. The Legal entities form opens. The default company is already created in the previous step. It is the DAT company. In the next training lesson we will load demo data (with companies). ClickClose.
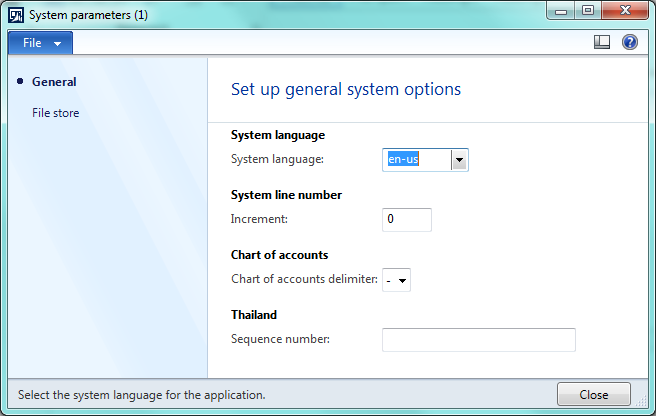
Click the Setup system parameters menu item. The System parameters form opens. Populate the System languagefield with the required language. Note that languages already exist in the Dynamics AX (they were populated on the Create reference data step). The rest parameters are optional. Close the form.
The “The Report data clean up job is added to the batch queue” message appears. This job runs recursively to clean up report data. The report data is collected and stored in special tables. When the report is printed, the collected report data can remain in the Dynamics AX tables. Since this data is no longer required, it can be cleaned up automatically. For this purposes this job is added to the batch queue. You can cancel this and any jobs from the batch queue later through the User interface: System administration > Inquiries > Batch jobs > Batch jobs.
Click the Import data menu item. The Import options form opens. Microsoft has not prepared the demo data in the DAT format for this version of Dynamics AX. We will import the demo data in the next training lesson. Close the form. Mark this step as complete.
Close the Dynamics AX and run again. The Microsoft Dynamics AX with all modules opens.
